Setting Up a Merge Queue
Implement your first merge queue.
Mergify’s Merge Queue is a powerful feature that helps you streamline and manage your pull request (PR) merging process more efficiently.
The Merge Queue works by ensuring each PR meets all defined conditions before it’s merged. It checks for PR status, branch conditions, approval reviews, and other set criteria, ensuring that your main branch is always stable and free of bugs that might occur due to unreviewed code. Furthermore, by managing PRs queue, Mergify eliminates the need for manual tracking and merging, freeing up your team to focus on what’s essential — building quality software.
In this guide, we’ll walk you through the process of setting up your first Merge Queue, explain how to add PRs to it, and show you how to configure the conditions that the PRs must meet before being merged. Whether you’re new to Mergify or looking to make your process more efficient, this guide will give you the knowledge you need to leverage the power of Merge Queue.
Understanding the Default Merge Queue
Section titled Understanding the Default Merge QueueMergify provides a default merge queue named default for every repository as
soon as you set up Mergify. This queue works out-of-the-box and uses your
repository’s branch protection
settings
defined in GitHub.
For instance, if you have branch protection rules that require passing CI
checks before merging, the default merge queue respects these rules. It means
Mergify will only merge pull requests that pass these checks and are in the
default queue.
Understanding this default queue is essential as it forms the basis of how Mergify handles your pull requests, ensuring a streamlined and orderly merge process.
For more details about merge queues and their functions, you can refer to our merge queue introduction.
Configuring the Merge Queue Rules
Section titled Configuring the Merge Queue RulesTo have a more refined control over the PRs entering the merge queue and when
they get merged, you can set up queue_rules in your Mergify configuration
file. These two constructs allow you to define custom conditions that should be
met before a PR is added to the queue (queue_conditions) and when it can be
merged (merge_conditions).
Here is an example of how you can use queue_rules:
queue_rules:
  - name: default
    queue_conditions:
      - check-success = mycijob
      - "#approved-reviews-by >= 1"
In this example, a PR can enter the default queue when the CI named mycijob
has passed, and if the pull request has been approved by at least one
contributor. If that’s the not the case, the PR won’t get queued.
The default for Mergify is to allow any PR to be queued.
The merge_conditions defines the condition required to get a PR merged once
it has entered the queue. Mergify injects all branch protection
settings
defined by GitHub, so there’s no need to repeat them. You can however, add more
if you want, or only rely on Mergify for setting up those conditions:
queue_rules:
  - name: default
    queue_conditions:
      - check-success = mycijob
      - "#approved-reviews-by >= 1"
    merge_conditions:
      - check-success = mycijob-extra
If a PR stops matching its queue_conditions, it will be removed from the
queue. That means there is no need to repeat the queue_conditions in the
merge_conditions as they are implicit.
Adding a Pull Request to the Merge Queue
Section titled Adding a Pull Request to the Merge QueueOnce you have your merge queue rules set up, you can manually add a PR to the
merge queue. To do this, use the queue command. This will
add your PR to the specified merge queue, or to the merge queue matching the
right queue_conditions.
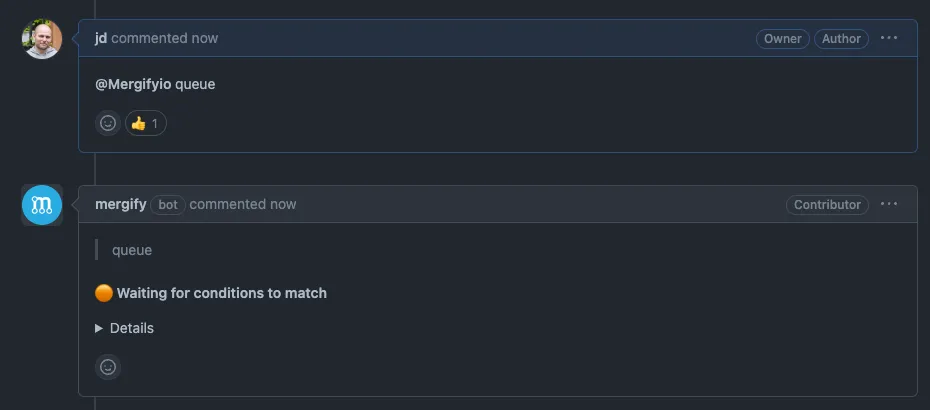
Remember, the PR will only be merged once the conditions defined in the
merge_conditions field are met.
If you prefer, you can ask Mergify to automatically queue pull requests that are ready using workflow automation.
Monitoring Your Merge Queue
Section titled Monitoring Your Merge QueueAfter you’ve added Pull Requests to your merge queue, you will want to monitor its status to understand the progression of your PRs. This can be done directly from the Mergify dashboard. In the “Repository” section, you will see a “Merge Queues” tab. Clicking on it will show you the current state of your merge queue.
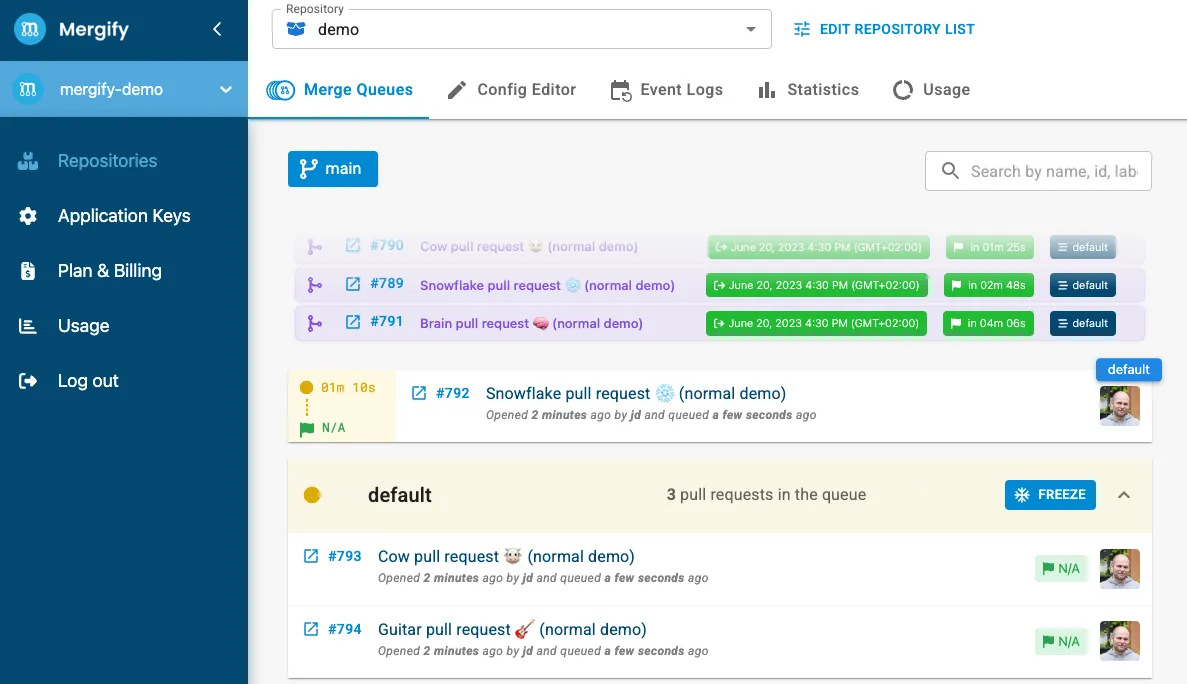
Here, you can view all the PRs in the queue and their current statuses. PRs
that are waiting for their merge_conditions to be met are marked as pending,
while those that have met all their queue_conditions are displayed in the
queue and will be merged when they reach the top of the queue.
Remember, the PRs in the queue are ordered based on their addition time. The PR added first will be merged first after all its conditions are met. You can modify the order of the pull request inside a queue using priorities.
Conclusion
Section titled ConclusionCongratulations, you’ve just set up your first Merge Queue with Mergify! You’re now armed with a powerful tool to automate and streamline your PR merging process, reducing the potential for conflicts and ensuring your main branch is always in a consistent, deployable state.
However, setting up a basic merge queue is just the beginning. Mergify’s powerful and flexible configuration system enables you to tailor your merge queues to your specific needs.
For further exploration and inspiration, here are some additional resources and use cases that you might find useful:
- Using priorities to order your pull requests;
- Using multiple queues;
- Speeding up your merge queue with speculative checks;
- Saving CI time with batches;
-
Delaying checks at merge time;
-
Splitting repositories into partitions (monorepo support).
Remember, the possibilities with merge queues are limited only by your imagination. Happy merging!