Writing Your First Rule
Automate your first workflow with Mergify Workflow Automation
Understanding The Configuration File
Section titled Understanding The Configuration FileThe Mergify configuration file consists of two primary components: rules and actions. Rules define the conditions under which specific actions should be triggered, while actions specify the automated tasks to be performed on the pull requests. By combining rules and actions, you can create a powerful and flexible automation process tailored to your specific requirements.
In the following sections, we will explore how to define rules using conditions and how to set up actions for various use cases, such as merging, labeling, and assigning pull requests.
Mergify streamlines your pull request process by applying rules you define. To utilize Mergify, you must create a configuration file within each repository where you want to enable its functionality.
Place the configuration file in the root directory of the repository, and name
it one of the following: .mergify.yml, .mergify/config.yml, or
.github/mergify.yml.
The configuration file relies on YAML, a simple and human-readable data file format. For comprehensive details on the configuration file format, please refer to the configuration file format section.
The Rules
Section titled The RulesTo create a rule in the Mergify configuration file, you must specify the following three essential components:
-
Rule name: A unique identifier for each rule, allowing you to easily manage and organize your automation workflow.
-
Conditions: A list of criteria that the pull request must fulfill for the rule to apply, such as the status of checks, labels, or approvals.
-
Actions: A list of automated tasks executed when the conditions are met, such as merging, labeling, or assigning the pull request.
By carefully crafting your rules, you can build a powerful and customized pull request automation process that aligns with your project’s needs.
Writing Your First Rule
Section titled Writing Your First RuleTo get started with creating your first rule in the Mergify configuration file, follow these steps:
-
Choose a unique name for your rule: This will help you identify and manage the rule within your configuration file.
-
Define the conditions: List the criteria that a pull request must meet for the rule to apply. Conditions are written in YAML syntax and may include factors like the pull request’s status, labels, or number of approvals.
-
Specify the actions: Determine the tasks that should be executed automatically when the conditions are met, such as merging the pull request, adding labels, or assigning reviewers.
Here’s a sample rule that demonstrates the process:
pull_request_rules:
  - name: "Automatic merge when CI passes and approved"
    conditions:
      - "#approved-reviews-by>=2"
      - "check-success=your-ci-name"
      - "base=main"
    actions:
      merge:
In this example, the rule named “Automatic merge when CI passes and approved” will be triggered when the following conditions are met:
- The pull request has at least 2 approved reviews.
- The your-ci-name check passes.
- The base branch for the pull request is main.
When these conditions are satisfied, Mergify will perform the following action:
- Automatically merge the pull request.
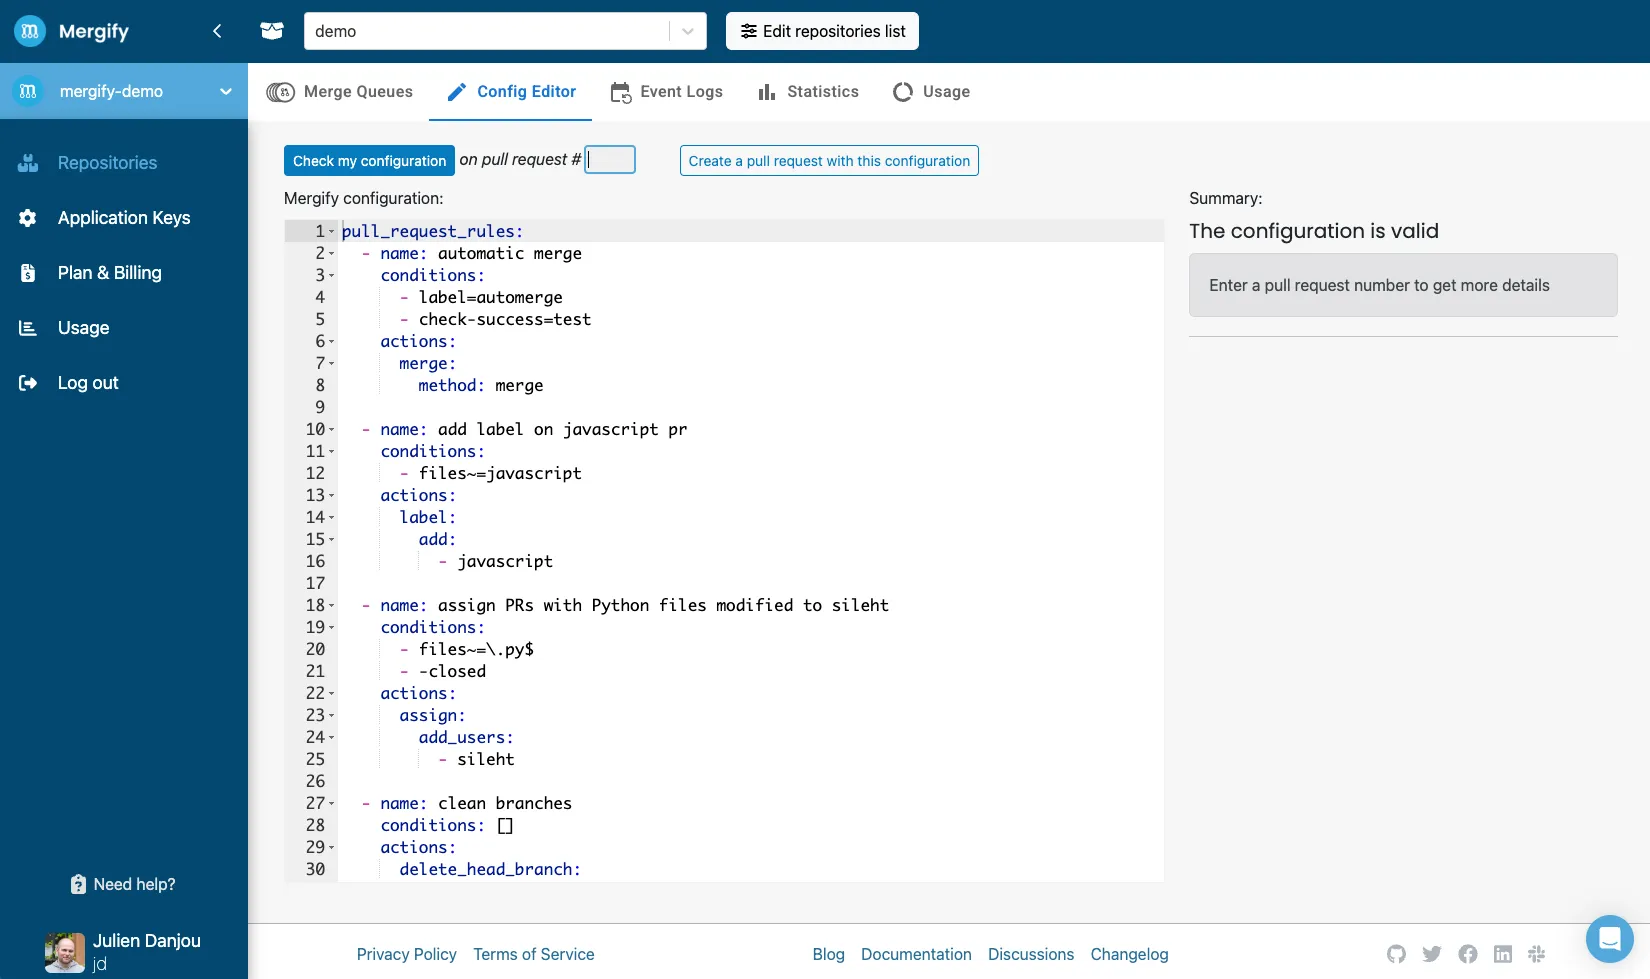
Using the Configuration Editor
Section titled Using the Configuration EditorThe Mergify dashboard provides a built-in configuration editor to help you create, edit, and test your configuration file easily. The editor allows you to write and validate your Mergify configuration without leaving the dashboard, ensuring that your rules are correctly formatted and functional.
To use the configuration editor, follow these steps:
-
Navigate to the Mergify dashboard: Log in to your Mergify account and access your dashboard.
-
Open the configuration editor: Locate and click on the Configuration Editor link or button within the dashboard.
-
Edit your configuration: Use the textarea provided to write or modify your Mergify configuration file. The editor supports YAML syntax and provides a convenient way to define your rules, conditions, and actions.
-
Specify a pull request number: To validate your configuration, enter a pull request number in the designated field. This allows the editor to test your configuration against a real pull request to ensure it works as expected.
-
Validate your configuration: As you edit your configuration, the editor automatically checks for syntax and formatting errors. Ensure that your configuration is valid before proceeding.
-
Create a pull request to save your configuration: Once you have finished editing and validating your configuration, click the “Create Pull Request” button. This will generate a new pull request with your updated configuration file, allowing you to review the changes before merging them into your repository.
By using the configuration editor, you can easily manage your Mergify rules and ensure a smooth automation process for your pull requests.
Understanding Mergify Rule Conclusions
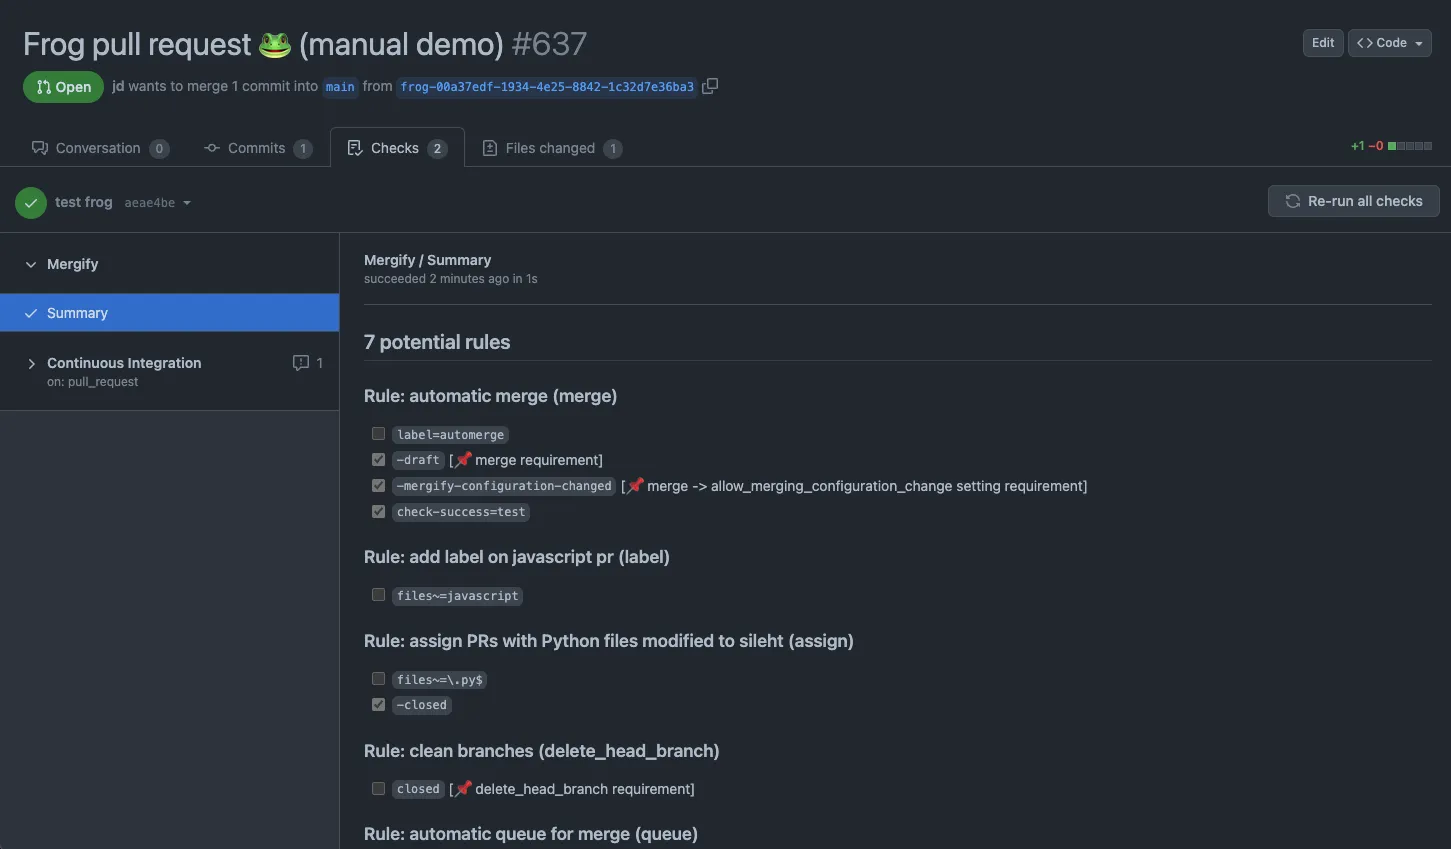
Section titled Understanding Mergify Rule ConclusionsMergify continuously evaluates your rules whenever a pull request is updated or modified. When a rule’s conditions are met, Mergify triggers the corresponding actions. To help users understand what is happening with their rules and why certain actions are or are not triggered, Mergify provides a summary of its rules evaluation within a Check, similar to other CI systems.
Mergify Summary
Section titled Mergify SummaryThe Mergify Summary is a concise report of the rules evaluation for each pull request. It is displayed as a Check within the GitHub UI, making it easy for you to review the results and understand the state of your rules and actions.
To view the Mergify Summary, follow these steps:
-
Open the pull request: Navigate to the pull request you want to review within the GitHub UI.
-
Access the Checks tab: Click on the “Checks” tab located near the top of the pull request page.
-
Locate the Mergify Summary: Scroll through the list of Checks to find the one named “Mergify”. Click on the “Details” link to view the full summary.
The Mergify Summary provides information on:
- The rules that were evaluated.
- The conditions that were met or not met.
- The actions that were triggered or not triggered.
By reviewing the Mergify Summary, you can gain insight into the behavior of your Mergify configuration and make any necessary adjustments to your rules and actions.